Getting started with persistence
Abstract
This page contains explanations and code samples for developers who need to store their entities into the database.
The Strongbox project uses OrientDB as its internal persistent storage through the
corresponding JPA implementation and spring-orm middle tier. Also we use JTA for transaction management and
spring-tx implementation module from Spring technology stack.
OrientDB Studio
As you are learning about Strongbox persistence, you may want to explore the existing persistence implementation. For development environments, Strongbox includes an embedded OrientDB server as well as an embedded instance of OrientDB Studio. By default, when you run the application from the source tree, you'll use the embedded database server. However, OrientDB Studio is disabled by default.
Running OrientDB Studio From Source Tree
To enable OrientDB Studio, you need only to set the property strongbox.orientdb.studio.enabled to true. You
can do this on the Maven command line by running Strongbox as follows:
$ mvn spring-boot:run -Dspring-boot.run.jvmArguments="-Dstrongbox.orientdb.studio.enabled=true"
There are two additional properties that can be used to configure OrientDB Studio:
strongbox.orientdb.studio.ip.addressstrongbox.orientdb.studio.port
Running OrientDB Studio From The Distribution
If you're running from the tar.gz, or rpm distributions, you can start Strongbox as follows to enable OrientDB Studio:
$ cd /opt/strongbox
$ STRONGBOX_VAULT=/opt/strongbox-vault STRONGBOX_ORIENTDB_STUDIO_ENABLED=true ./bin/strongbox console
Please, note that the STRONGBOX_VAULT environment variable needs to be pointing to an absolute path for this to work.
As with the source distribution, you can set additional environment variables to further configure OrientDB Studio:
$ export STRONGBOX_ORIENTDB_STUDIO_IP_ADDRESS=0.0.0.0
$ export STRONGBOX_ORIENTDB_STUDIO_PORT=2480
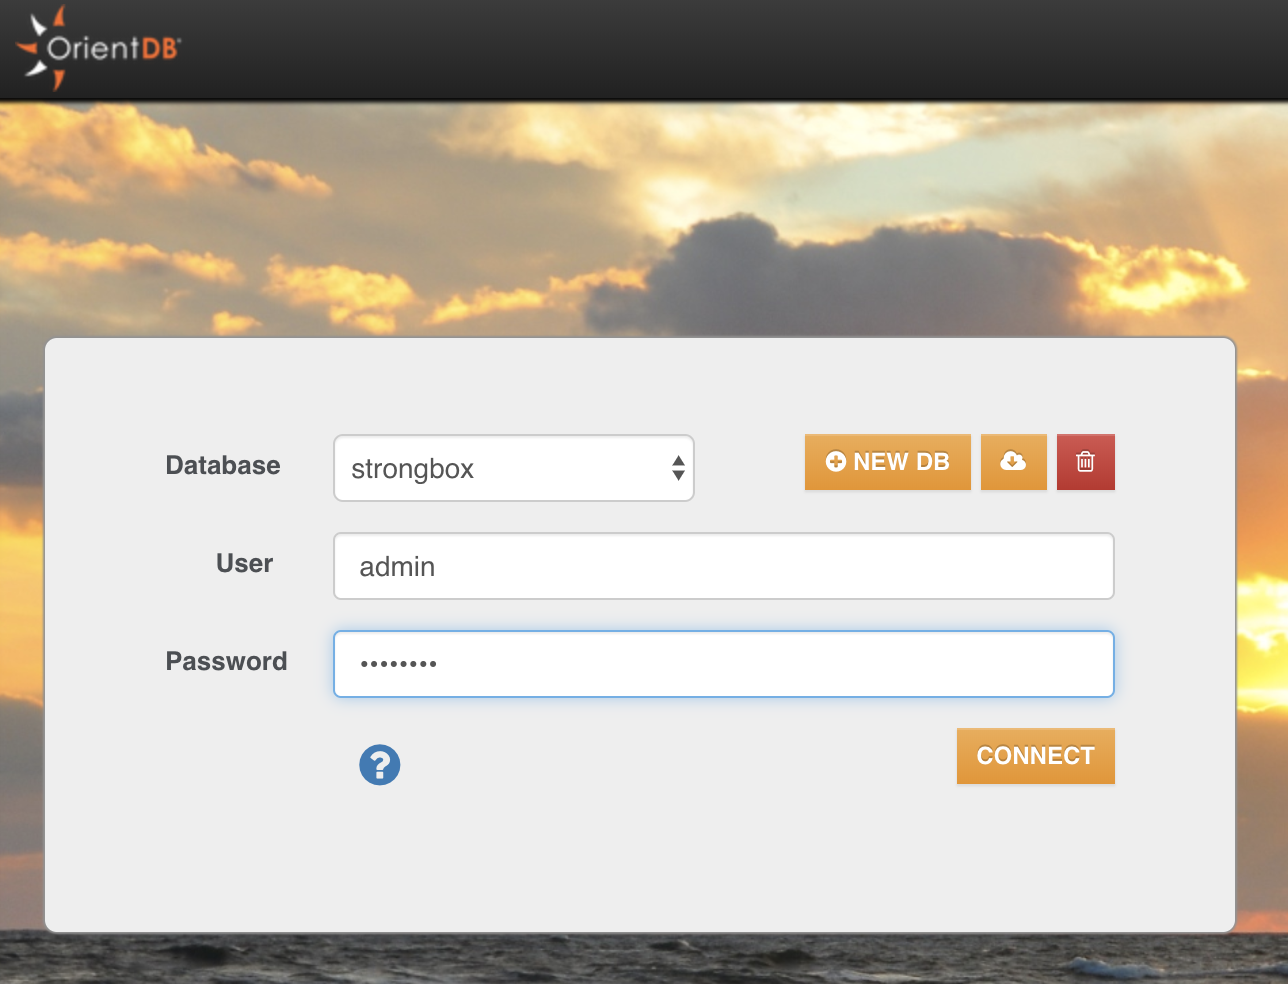
Once the application is running, you can login to OrientDB Studio by visiting
http://127.0.0.1:2480/studio/index.html in your browser. The initial credentials are admin and password.
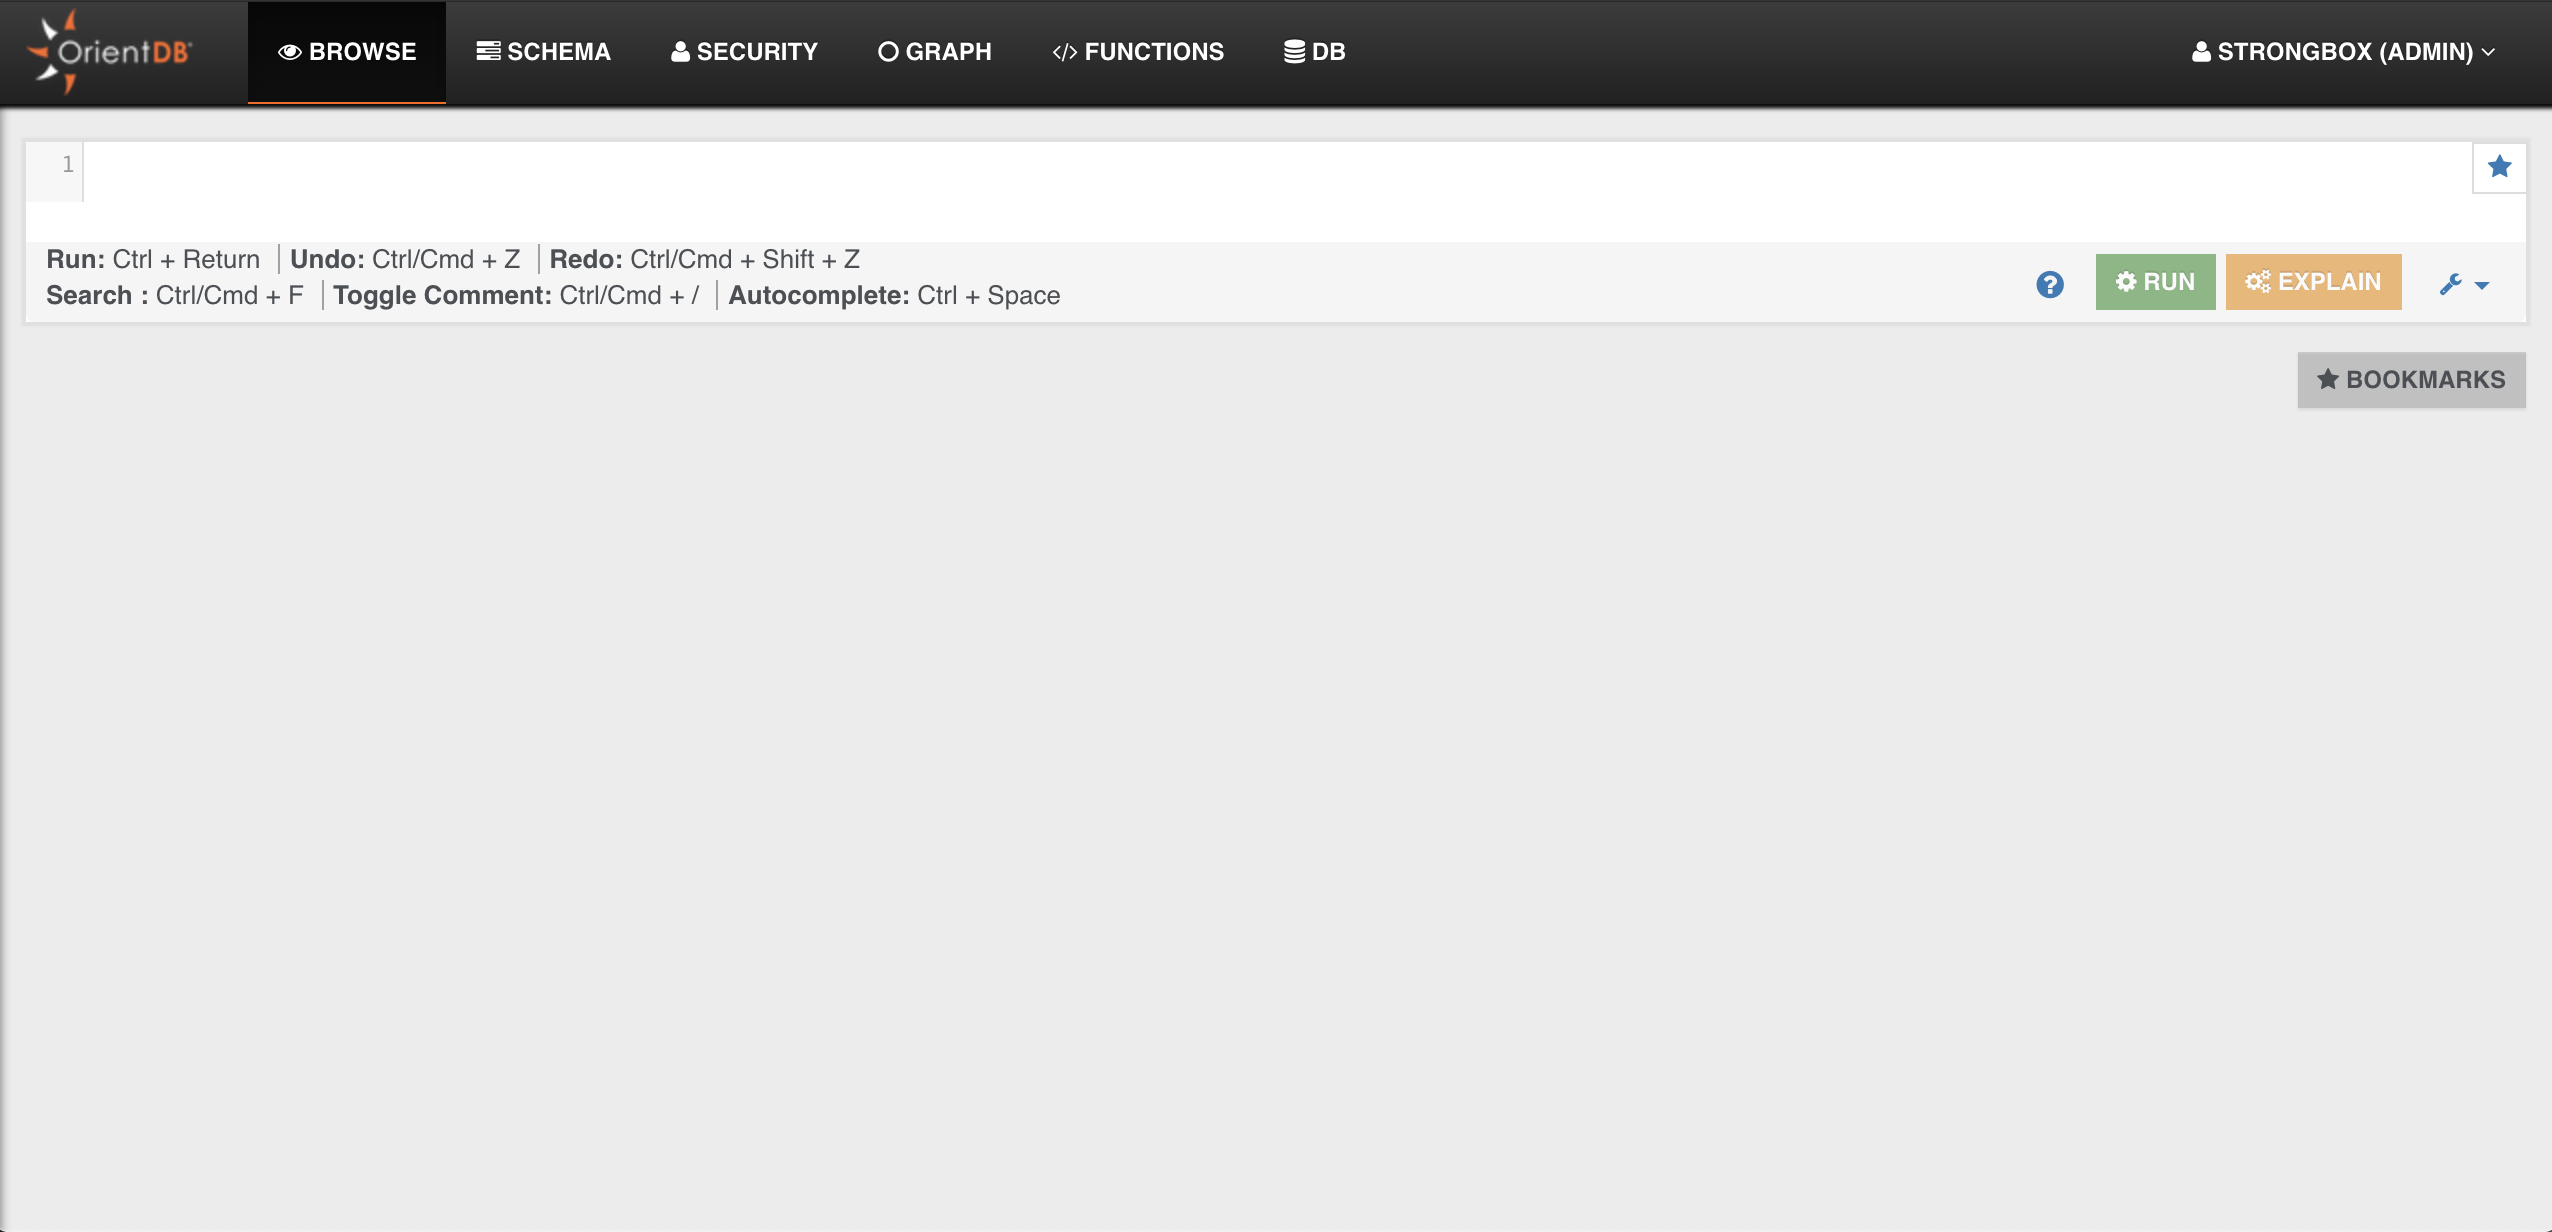
After your login, you'll land on the Browse Screen, which allows you to query the embedded database.
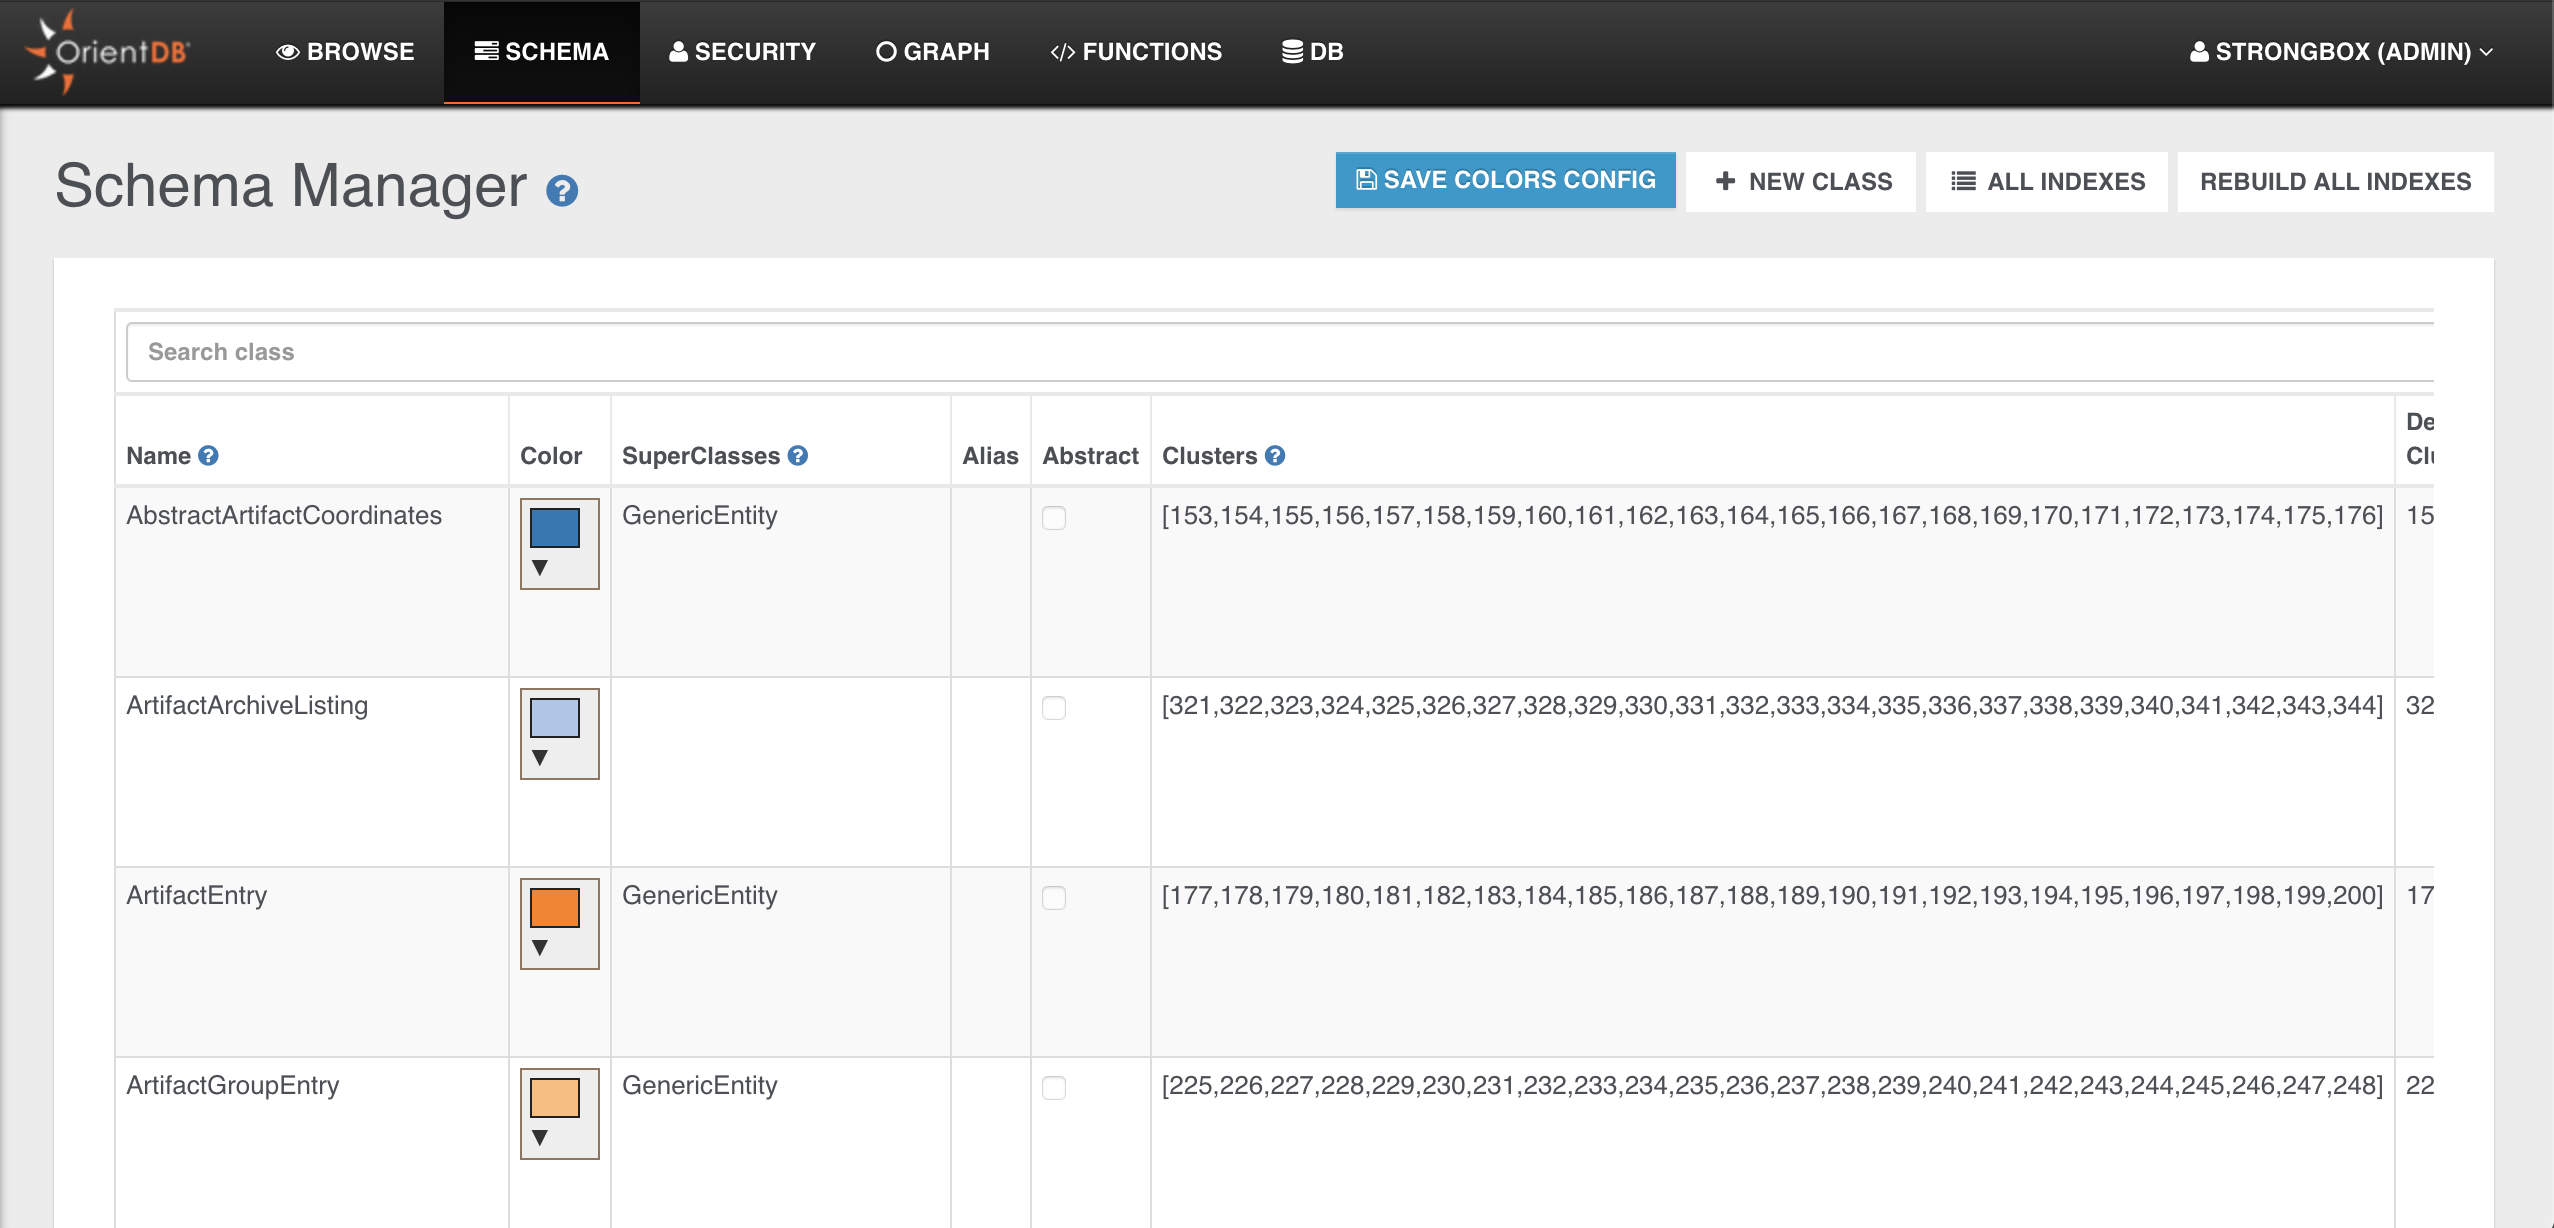
Finally, you can explore the schema defined in the database by clicking SCHEMA.
Adding Dependencies
Let's assume that you, as a Strongbox developer, need to create a new module or write some persistence code in an
existing module that does not contain any persistence dependencies yet. (Otherwise you will already have the proper
<dependencies/> section in your pom.xml, similar to the one in the example below). You will need to add the
following code snippet to your module's pom.xml under the <dependencies> section:
<dependency>
    <groupId>${project.groupId}</groupId>
    <artifactId>strongbox-data-service</artifactId>
    <version>${project.version}</version>
</dependency>
Notice that there is no need to define any direct dependencies on OrientDB or Spring Data - it's already done via
the strongbox-data-service module.
Creating Your Entity Class
Let's now assume that you have a POJO and you need to save it to the database (and that you probably have at least
CRUD operation's implemented in it as well). Place your code under the org.carlspring.strongbox.domain.yourstuff
package. For the sake of the example, let's pick MyEntity as the name of your entity.
If you want to store that entity properly you need to adopt the following rules:
- Extend the
org.carlspring.strongbox.data.domain.GenericEntityclass to inherit all required fields and logic from the superclass. - Define getters and setters according to the
JavaBeanscoding convention for all non-transient properties in your class. - Define a default empty constructor for safety (even if the compiler will create one for you, if you don't define any
other constructors) and follow the
JPAandjava.io.Serializablestandards. - Override the
equals()andhashCode()methods according to javahashCodecontract (because your entity could be used in collection classes such asjava.util.Setand if you don't define such methods properly other developers or yourself will be not able to use your entity). - Optional - define a
toString()implementation to let yourself and other developers see something meaningful in the debug messages.
The complete source code example that follows all requirements should look something like this:
package org.carlspring.strongbox.domain;

import org.carlspring.strongbox.data.domain.GenericEntity;

import com.google.common.base.Objects;

public class MyEntity
        extends GenericEntity
{

    private String property;

    public MyEntity()
    {
    }

    public String getProperty()
    {
        return property;
    }

    public void setProperty(String property)
    {
        this.property = property;
    }

    @Override
    public boolean equals(Object o)
    {
        if (this == o)
        {
            return true;
        }
        if (o == null || getClass() != o.getClass())
        {
            return false;
        }

        MyEntity myEntity = (MyEntity) o;

        return Objects.equal(property, myEntity.property);
    }

    @Override
    public int hashCode()
    {
        return Objects.hashCode(property);
    }

    @Override
    public String toString()
    {
        final StringBuilder sb = new StringBuilder("MyEntity{");
        sb.append("property='").append(property).append('\'');
        sb.append('}');

        return sb.toString();
    }
}
Creating a DAO Layer
First of all you will need to extend the CrudService with the second type parameter that corresponds to your ID's data type. Usually it's just strings.
To read more about ID's in OrientDB, check the manual
package org.carlspring.strongbox.users.service;

import org.carlspring.strongbox.data.service.CrudService;
import org.carlspring.strongbox.users.domain.MyEntity;

import org.springframework.transaction.annotation.Transactional;

/**
 * CRUD service for managing {@link MyEntity} entities.
 *
 * @author Alex Oreshkevich
 */
@Transactional
public interface MyEntityService
        extends CrudService<MyEntity, String>
{

    MyEntity findByProperty(String property);

}
After that you will need to define an implementation of your service class.
Follow these rules for the service implementation:
- Inherit your CRUD service from
CommonCrudService<MyEntity>class; - Name it like your service interface with an
Implsuffix, for exampleMyEntityServiceImpl; - Annotate your class with the Spring
@Serviceand@Transactionalannotations; - Do not define your service class as public and use interface instead of class for injection (with
@Autowired); this follows the best practice principles from Joshua Bloch 'Effective Java' book called Programming to Interface; -
Optional - define any methods you need to work with your
MyEntityclass; these methods mostly should be based on common API formjavax.persistence.EntityManager, or custom queries (see example below); -
Avoid query parameters construction through string concatenation!
Please avoid using query parameter construction through string concatenation!
This usually leads to SQL Injection issues!
Bad query example:
String sQuery = "select * from MyEntity where proprety='" + propertyValue + "'";
What you should do instead is to create a service which does properly assigns the parameters.
Here's an example service:@Transactional public class MyEntityServiceImpl extends CommonCrudService<MyEntity> implements MyEntityService { public MyEntity findByProperty(String property) { String sQuery = "select * from MyEntity where property = :propertyValue"; OSQLSynchQuery<Long> oQuery = new OSQLSynchQuery<Long>(sQuery); oQuery.setLimit(1); HashMap<String, String> params = new HashMap<String, String>(); params.put("propertyValue", property); List<MyEntity> resultList = getDelegate().command(oQuery).execute(params); return !resultList.isEmpty() ? resultList.iterator().next() : null; } }
Register entity schema in EntityManager
Before using entities you will need to register them. Consider the following example:
@Inject
private OEntityManager oEntityManager;

@PostConstruct
public void init()
{
    oEntityManager.registerEntityClass(MyEntity.class);
}